Seasonal Home Maintenance Checklist

Seasonal Home Maintenance Checklist
As we get to see the lovely red and yellow shades appearing on the forests of maple and birch trees, ducks and geese are not the only ones who gear up to fly towards the south. If you are amongst those who live in deep southern zone or tropical areas, mere switching down the air conditioners and locking of doors and windows can do the task for your winter care.
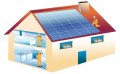
But, many people who own a second home at much colder regions have to get ready for their annual "closing up for the winter" ritual. This activity is usually done by most of the people who own seasonal homes, especially in the northern part of the world where there are chances of temperature to go dangerously below the normal freezing point.
While thinking of preparing a seasonal home to stand strong against the winters, you must keep three things in mind to deal with:
1) Keep the cold elements out.
2) Keep the squirrels and rabbits out (I remember how much freaked out I was during my first winters at New York when I heard squirrels running around in the wall insulations)
3) Protect the interiors and plumbing from the effects of freezing.
The way you handle all these issues largely depends on your environment and kind of house you have, but the final aim remains the same - a house that is well protected using minimal resources and doesn't open up to your surprise(or shock) after months of closure.

Though most of the seasonal homes come with conventional designs, people still get attracted to log "cabins", which are a lot different from the actual traditional log homes. Even though modern log cabins have a base that follows today's architectural designs, there are few things that you need to take care off before closing them off this winter season.
Checking and Repairing any Wear and Tear
In order to start the activity, begin with an inspection of the exteriors of your log home. Check if there are any signs of weathering anywhere, for example grey or black patches that signify that the sealant has been worn enough to let the ultraviolet rays, wind and probably water to allow access to the wood. Also, check the caulk joints and any exposed seals. Check the lateral joints where logs rest against each other. Don't forget the logs closer to the ground, particularly the zones where they might get affected by the rain water hitting the ground or the pavement.
If you notice any signs of weathering, or you find caulk to be stretched or torn, initiate your remedial procedure at an instance. You can fix the minor weathering by applying sealant at the effected areas using a brush or a garden sprayer. For bigger cases, you might need to give your house a complete dose of preservative. This treatment includes covering doors, windows and hardware with plastic followed by spraying the exterior with a garden or airless sprayer. You may also choose to have power washer before this treatment. In case you are good at maintaining your log home, these steps can be skipped at the given time.
If your seasonal home has gutters, ensure that they don’t have any blockages and work fine. This can be done by making a trip to the roof with a garden hose and gloves to clear gutters and down spouts. Ensure that water drains a nice distance away from the home.
While you inspect your roof, you can also check the chimneys. If needed, seal loose flashing with roofing tar. In case your chimney is used pretty often, you may need to clean or sweep it well. It is better to close off the chimney to stop any animals from coming inside the home.
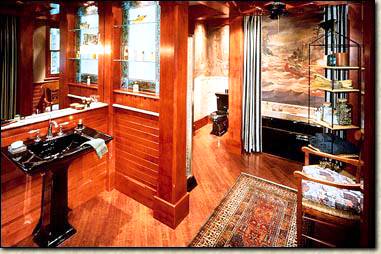
Once the walls and roofs are checked, your interiors need to be inspected for any wear and tear. Check the seals between logs and around doors and windows. Check the caulk joints and repair the seals if needed. Ensure that all the windows are properly closed and locked. Close the fireplace dampers and ensure that all the curtains are closed to prevent any ultraviolet light to fade your carpets or wooden flooring.
Checking the Plumbing
If your home is an area that is subjected to prolonged freezing, a crucial part of the process comes when you fix your plumbing. In centrally heated homes, some owners leave thermostats set at a low temperature (50-55 degrees) to protect pipes from freezing. If the house has to be left unheated, ensure that you move the water from all pipes and tanks that can be subjected to freezing. Generally, this means shutting off the main water valve or turning off the well pump and then opening all the faucets, thereby enabling the water to drain off from the lines. If your well includes a pressure tank or reservoir, it usually includes a drain valve that may enable you to connect a garden hose. It is important to open all the faucets to avoid vacuum that can hold water in the lines. After all the water has been drained off, leave the faucets open. Turn off and drain the water heater.
A zone that is often overlooked while setting the plumbing is the trap beneath the sinks. Some traps have a drain plug; however draining traps usually creates an air passage way all the way to the septic tank or sewer. Instead, get a nontoxic antifreeze such as the one used in RV plumbing, and pour enough antifreeze into drains to replace the water in the traps. For toilets, turn off the valve to the fixture, flush the toilet, add some antifreeze solution and flush again.
Always ensure that all your appliances - both electrical and mechanical are turned off and the lights extinguished. Prop the refrigerator door open to allow air circulation. Last, switch off the master electrical switch, lock the door and say adios to your log retreat until next spring.